Thursday, January 20, 2011

Getting Creative With Transparency in Web Design

Content copied for preservation only. 

Original link: http://www.smashingmagazine.com/2008/04/16/getting-creative-with-transparency-in-web-design/

By Sean Hodge  April 16th, 2008  Design   61 Comments  Publishing Policy

Arm yourself with the knowledge of how different file types of images can be used to achievetransparency on web-pages. It’s important to first understand these basics. Then learn how to push the limitations of browser support. Take a look at what others are doing with transparency on the Web; only then you’ll be able to learn how to get creative with transparency in Web design.
There are well-established methods of imitating Web transparency that have been developed to overcome browser support issues. While we can appreciate past solutions, it’s important to break out of this faux methodology and learn to work with PNG graphics. We are at a tipping point where IE7 continues to grab market share. And fortunately, IE7 has thet support for full Alpha Transparent PNG graphics. In the near future, transparent PNG graphics will have excellent browser support.
Ultimately, it’s necessary to consider creative uses for transparency on the Web. This article reviews the use of faux transparency methods, presents examples of transparent images on both fixed and dynamic backgrounds, and points to creative solutions that take full creative advantage of today’s modern Web transparency effects.

1. Learn How to Overcome Web Transparency Browser Limitations

There are different types of inherent limitations with creating transparency for web-sites. Currently, if you’re going to work with PNG graphics, you’ll need to harness IE6, which has poor support for alpha transparency. This means working with IE specific code, or scripting-based solutions.
It’s important to know most common ways to overcome browser limitations. There are plenty of articles across the Web that review these issues. There are two articles below that describe Conditional Comments and a script-based solution. First though, review Jeff Croft’s article on creative use of transparent graphics, as it’s an excellent introduction to this topic.
  • Jeff Croft wrote an excellent article on the topic of using PNG graphics creatively called Creative Use of PNG Transparency in Web Design. This is the article to get started with on this subject. It covers the file formats and issues and then discusses creative transparency effects for images. It gives advice for watermarking images with PNG’s, utilizing reversed transparent backgrounds, and other use of transparent PNG images.
    49 in Getting Creative With Transparency in Web Design
  • In some situations utilizing specific IE filters to display Alpha Transparency in IE6 is needed. The technique is limited, quirky, and can slow load times, but is still helpful in some situations. Review the article PNG Transparency for Internet Explorer (IE6 and Beyond) for an explanation of how to implement this solution.
    Beyond Ie6 in Getting Creative With Transparency in Web Design
  • Drew McLellan wrote an elegant script-based solution for dealing with the lack of PNG support in IE6. It was released as part of last year’s 24 Ways project and is called Transparent PNGs in Internet Explorer 6. You may also find script-based solutions available as plug-ins for your favorite CMS or in your Javasript library of choice.
    24 Ways in Getting Creative With Transparency in Web Design

2. Faux Transparency on the Web

Faux transparency involves using images that imitate transparency with visual transparency effects. Such images can be created using applications such as Adobe Photoshop. Notice that the images used in faux solutions have no transparency data encoded, but are rather solid images that are designed to look transparent.
After creating a transparent design, you then prepare the graphics and Save for Web. You export solid graphics and use those when you code up the Website. The result looks just as transparent to end users. It’s a common solution used to sidestep issues of poor browser support for encoded transparent PNG image files. It requires no browser hacks for IE6 and no additional Javascript.
Of course, these solutions are not elegant in all situations. Take the case of horizontal navigation within site headers. There is a quick and common solution; you create faux transparency for each list item of the horizontal navigation. You do this by placing the background images of the horizontal navigation items absolutely to match the header background pattern.
In the case below, both the height and width are constrained on the list elements. With this type of solution you lose the ability for the design to enclose text as it gets resized. The background elements are fixed in place. Invariably, you will make some usability sacrifices when using this type of solution. Click on the photo below to view the web-site.
Pil in Getting Creative With Transparency in Web Design

3. Transparent PNG Background Solutions

After reviewing Web transparency, you’ll find out that there are strong reasons to move to PNG graphics for layout designs. They have full Alpha Transparency ability and a wide spectrum of colors. They optimize better than GIF files. However, it’s important to notice that browser support has traditionally held back the use of transparent PNG graphics.
With IE7 having full PNG support, many designers have started adopting the use of PNG graphics into their workflow. To cater to the dwindling IE6 user market Javascript-based solutions can resolve poor PNG support in that browser, or Conditional Comments can be used to fix small case scenarios. Below is one web-site that is currently using PNG graphics for its column backgrounds and is using Conditional Comments to target support in IE6.
Koko in Getting Creative With Transparency in Web Design

4. Flexible Width Transparency

If you’d decide to place transparent images on an opposite end of the browser window, images could overlap when the window is resized. You could use the flexible width transparency technique to create an interesting effect. The Risington Podcast uses a similar effect in its footer.
Ras in Getting Creative With Transparency in Web Design
Another technique is explained in this article In the Lab: Doing strange things to CSS Backgrounds. The solution is to creatively use varying percentages for background image placement. The background appears to move when the browser window is resized. Or for a more polished example that uses a similar technique view this article How to recreate Silverback’s Parallax.
Silverback in Getting Creative With Transparency in Web Design

5. Pushing the Boundaries

Scripting technologies like Ajax and Javascript open up ways to creatively use transparency in Web design.Creating draggable elements is an excellent opportunity to use transparent graphics that will overlay the page design.
The example below, Raduceuca.com, has an interesting ability to drag the search around the browser window. While being not the most useful application of this technique, it is an interesting experiment, and a funny little feature for users to play with. It’s not implemented perfectly in IE6, see first image below. As you can see in the second images, it works great in IE7. Clearly, the designer decided to offer limited support to IE6.
Rainbow in Getting Creative With Transparency in Web Design
When dealing with older browsers it’s important to have a strategy in place that is in line with the actual traffic those browsers receive. Depending on the numbers, older browser based solutions could be given limited support; Or, as in the case of really old browsers, no support at all. Make sure you have a plan first, though.

Conclusion

Consider switching over to PNG format images for designing web layouts. Find new creative ways to use transparent images in your designs. Experiment with different uses for this technology. Develop a strategy for dealing with IE6, but ultimately look toward the future.


Inserting Windows Media Player Into PowerPoint


Content copied for preservation only.
Original link: 
http://www.hofstra.edu/StudentServ/CC/Chelp/chelp_Inserting_Media_Player.cfm


Put the media clip in the same directory/folder where the PowerPoint presentation is located. If the PowerPoint presentation and the media clip are both in the same directory, the path to the media clip will not need to be specified and there is a higher likelihood that the clip will play correctly.

1.
 Make the Control Toolbox visible (View > Toolbars > Control Toolbox).
2. Click the More Tools icon in the lower right of the Controls Toolbox. A pop-up menu will appear. Select Windows Media Player from the pop-up menu (Figure 1).

Figure 1 Control Toolbox and the pop up menu when the More Tools icon is clicked.

3. The mouse pointer will change to a thin plus sign. Drag the mouse pointer to the size you want the media player to appear on the slide (Figure 2).


Figure 2 Windows Media Player embedded in a PowerPoint Slide (The Control Toolbox is also available.)

4. Right-click on the Windows Media Player and select Properties from the pop-up menu. A dialog box similar to Figure 3 should appear. (Custom is highlighted because the mouse pointer was clicked in the field to the right of Custom).

Figure 3 Windows Media Player Properties Dialog Box

5.
 Click the button displaying the ellipse. The Windows Media Player Properties dialog box will appear (Figure 4).

Figure 4 Windows Media Player Properties dialog box

6. Click the Browse button to locate the file.
7. After the file name and path have been filled in the File Name or URL field, erase the path part of the field so only the file name remains.
As an example, if the file name and path were c:\temp\x.wmv, you would erase c:\temp\so that only x.wmv remained in the File Name or URL field. (This assumes that the PowerPoint presentation would also be saved in c:\temp.)

Wednesday, January 19, 2011

Autoplay Video CD (VCD)

Content copied for preservation only. Original link: http://navasgroup.com/tech/autoplay_vcd.htm

HOW TO: Autoplay Video CD (VCD) in Windows

Copyright 2002 The Navas GroupSM, All Rights Reserved.
Permission is granted to copy for private non-commercial use only.Posted as <http://navasgroup.com/tech/autoplay_vcd.htm>.  Updated: Tuesday, September 14, 2010.
GENERAL NOTES:
  • This information was compiled by the author and is provided as a public service. The author is not responsible for any errors or omissions, or for any consequential problems that might result. USE AT YOUR OWN RISK.
  • Email comments and suggestions to John Navas

Introduction

A pure Video CD (VCD) will not Autoplay (automatically play the video on an inserted disc) in Microsoft Windows without some sort of "helper" application. Although there are several ways to create a Video CD that will Autoplay without a "helper" application, the following procedure, based on Windows Media Player, is arguably the simplest, easiest, and cleanest.

Requirements (player computer):

  1. Windows Media Player (6.4 or above; 7 or above recommended).
  2. Windows Me, Windows 2000, Windows XP (or later), or earlier versions of Windows with Internet Explorer 5 (or above).

Method

  • Use an .ASX Windows Media Metafile (named VCD.ASX in this document, but any valid filename could be used) to control Windows Media Player.
  • Use an AUTORUN.INF file to automatically launch the .ASX Windows Media Metafile.
Both of these two files must be placed in the root directory of the Video CD, as described below. They should not interfere with playing the Video CD on a Video CD or DVD player.

AUTORUN.INF

The contents of the AUTORUN.INF text file are always (assuming the .ASX file is named VCD.ASX):

Method 1Comments
[autorun]
ShellExecute=VCD.ASX
The 2nd line (ShellExecute) uses the registered .ASX file association to process the .ASX Windows Media Metafile. The registered application is usually (but not necessarily) the current version of Windows Media Player; if so, playback begins in a default window. Method 1 is preferred unless you want playback to begin full screen, in which case use Method 2.
Method 2Comments
[autorun]
ShellExecute=mplayer2 /fullscreen VCD.ASX
Method 2 is used to begin playback full screen. It should explicitly invoke the older version (6.4) of Windows Media Player, which (unlike the latest version) supports the "/fullscreen" parameter. The older version apparently remains installed even when the newer version is installed (on Windows XP at least).

.ASX file

The .ASX file contains text commands that allow you to control Windows Media Player. Simple examples:

Play single video clipComments


  • The first Title line (with "Name of my Video CD" as an example) is optional; if present, Windows Media Player will display your framed text as a title for the entire Video CD.
  • The lines from  to  play a single clip; repeat those lines if there are additional clips to be played, as in the 2nd example.
  • The Title line in a given Entry ("My Video Clip #1" and "My Video Clip #2" in the examples) is also optional; if present, Windows Media Player will display your framed text as a title for the clip.
  • The Ref line tells Windows Media Player where to find the clip. When a Video CD is created, your clip(s) will placed in the "MPEGAV" root folder (directory) on the CD. The particular clip names depend on the CD authoring software you use; the example above is for ahead Nero Burning ROM (highly recommended for Video as well as other types of CDs and now DVDs). The file extension is usually .DAT, rather than (say) .MPG, but Windows Media Player will still recognize the format and play the file (if the correct codec is installed).
  • For complete documentation on Windows Media Metafiles, see the Windows Media Player SDK.
Play two video clips


Creating the Video CD

Getting the .ASX Windows Media Metafile and the AUTORUN.INF file into the root directory of a Video CD can be easy or hard depending on the CD authoring software you use. In Nero Burning ROM (version 5) it's easy: after a Video CD compilation (layout) has been created, use the clip names in the "MPEGAV" folder (directory) to create the .ASX file, drag and drop the .ASX and AUTORUN.INF files into the upper right pane of the compilation window (set to "\" root), and then burn.

Related Links

Volumouse - Control PC volume with mouse

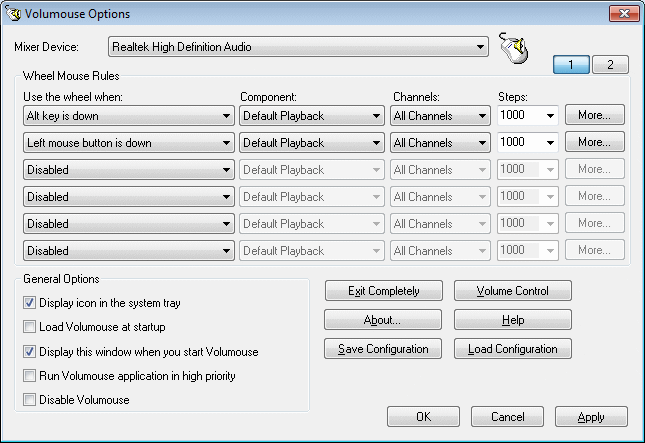
Volumouse is a FREE, quick and easy way to control the sound volume with your mouse wheel on the fly. It allows you to bind volume control to your mouse using all kinds of conditional rules for determining when the wheel will be used to control volume.

Some machines do not have a keyboard volume control which makes you have to find your "volume control" icon in the task bar, double click, then adjust. Not ideal. Also, some laptops make it difficult by making you hold down a FN key on one side and arrow keys on the other side... makes one hand, quick volume control tedious. Thanks NirSoft!

http://www.nirsoft.net/utils/volumouse.html

Saturday, January 8, 2011

Open Source FREE software

Just wanted to share some open source FREE software in case you haven't heard of them and don't want to pay for increasingly expensive and bloated Adobe Photoshop, Illustrator, microsoft Office packages.

Instead of Photoshop, try:
GiMP:  GIMP is an acronym for GNU Image Manipulation Program. It is a freely distributed program for such tasks as photo retouching, image composition and image authoring.
http://www.gimp.org/

Instead of Illustrator or Corel Draw, try:
InkScape:  An Open Source vector graphics editor, with capabilities similar to Illustrator, CorelDraw, or Xara X, using the W3C standard Scalable Vector Graphics (SVG) file format. 
http://www.inkscape.org

Instead of Microsoft office, try:
OpenOffice.org: OpenOffice.org 3 is the leading open-source office software suite for word processing, spreadsheets, presentations, graphics, databases and more. It is available in many languages and works on all common computers. It stores all your data in an international open standard format and can also read and write files from other common office software packages. It can be downloaded and used completely free of charge for any purpose. 
- some other alternatives:
1.  http://sixrevisions.com/graphics-design/10-excellent-open-source-and-free-alternatives-to-photoshop/
2. http://www.artweaver.de/home-en/
3. http://garmahis.com/software/illustrator-free-alternatives/

Nothing can completely replace such feature rich pay products as the industry standards but for most users these alternatives are great for home and even functional for commercial use. For more info on Open Source Software, go here: 
http://sourceforge.net/about and here: http://opensource.org/

Wednesday, March 17, 2010

Xref Fade Control

This was troublesome to someone in the office. Thanks to the Mad Cadder for this solution. Sometimes, AutoCrap seems to flip a few switches on its on. How does that happen??

Original content from "The Mad Cadder" - copied below:


I am not sure if this is a new features for AutoCAD 2009 or 2010, but the solution is the same. When an xref is inserted in the drawing the colours appear faded. It looks like it is in a permanent "in-place edit block" mode but it is not.

I actually like this new feature because it allows for visual recognition of line work and a distinction between an xref and objects drawn.

To control the intensity of the fade or remove the fading use the following steps:In AutoCAD, open the OPTIONS dialogue box. Choose the DISPLAY tab. Located at the bottom-right of the dialogue box, there is a section called "Fade Control". Adjust the slide bar labeled "Xref display" to control the intensity of the Xref fade.


Thursday, January 7, 2010

Google Wave - The wave of the Future?


Heard of it yet?
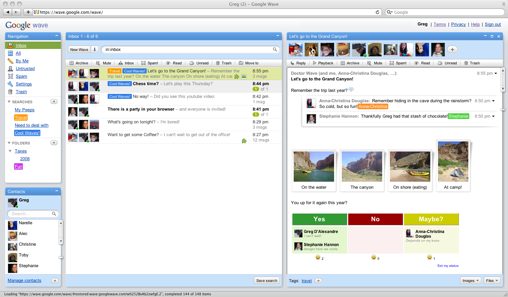
Google Wave is an online tool for real-time communication and collaboration. A wave can be both a conversation
and a document where people can discuss and work together using richly formatted text, photos, videos, maps, and more.

At this point, it may take a while to get an invitation to use this early version of Wave. The links below are some articles for more info. as well as the official google page where you can ask for an INVITATION to be a user.